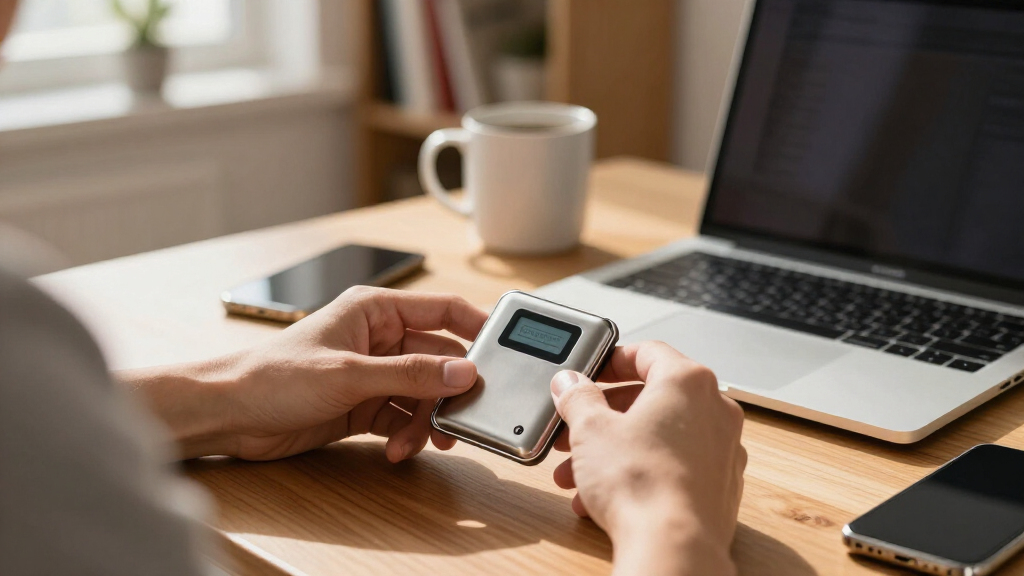

This guide walks you through setting up a hardware cryptocurrency wallet from a sealed box to a verified, working setup, including making your first small test transaction. A hardware wallet stores your private keys on an offline device, keeping them out of reach of malware and phishing attacks that target software wallets and exchange accounts.

Get hardware and tech essentials delivered free with Prime
- Fast, free delivery on millions of items
- Prime Video, Amazon Music and more included
- Member-only deals all year

Tangem Crypto Wallet – Pack of 2 Cold Storage Hardware Wallet
- ✔ Security: EAL6+ certified chip
- ✔ Blockchains supported: 90
- ✔ Coins/tokens supported: 14,100+

Ledger Nano S Plus – Classic Crypto Hardware Wallet (Matte Black)
- ✔ Display: 1.1 inch
- ✔ Connectivity: USB-C (no Bluetooth)
- ✔ Security: CC EAL 6+ certified Secure Element

Ledger Nano X Crypto Hardware Wallet with Bluetooth
- ✔ Connectivity: Bluetooth, NFC, USB
- ✔ Display: 1.1 inch
- ✔ Coins/tokens supported: 15,000+
By the end, you will have an initialized hardware wallet, a securely stored recovery phrase, companion software installed on your computer, and a small amount of crypto moved to the device that you can send and receive safely. This guide is written for beginners with little or no hardware wallet experience. Expect the full process to take 45 to 90 minutes, and do not rush the recovery phrase backup portion — mistakes there are the most expensive ones in cryptocurrency.
Difficulty: Beginner | Time: 45-90 minutes
What You’ll Need
Tools & Materials:
- A new hardware wallet purchased directly from the manufacturer (Ledger, Trezor, Coldcard, BitBox, or similar) — never from a third-party marketplace reseller
- A computer or phone with an internet connection and a USB port (or the appropriate cable/adapter)
- The manufacturer’s official companion app (e.g., Ledger Live, Trezor Suite, BitBoxApp)
- Pen and the supplied recovery sheets, or a metal backup plate for the recovery phrase
- A small amount of cryptocurrency (about $20-50 worth) for testing transactions
- An existing exchange account or software wallet to send the test funds from
Knowledge:
- Basic understanding that a recovery phrase controls your funds and must never be shared or typed into a website
- Comfort installing software on your computer
- Familiarity with sending crypto from an exchange or another wallet
Order your wallet directly from the manufacturer’s official website (ledger.com, trezor.io, bitbox.swiss, etc.). Devices from resellers on marketplaces can be tampered with or come with a pre-filled recovery phrase, which is a known scam. Never use a device that arrives with a recovery phrase already written on a card, a scratch-off panel revealing a phrase, or a PIN already set.
Tangem Crypto Wallet – Pack of 2 Cold Storage Hardware Wallet
The Tangem takes a fundamentally different approach from both Ledger devices, and that difference is its greatest strength. Instead of a stick-shaped gadget with a screen, you get two credit-card-sized NFC cards — one to use, one to serve as an encrypted backup. Tap the card against your phone and you’re managing assets across 90 blockchains and over 14,100 coins, tokens, DeFi positions, and NFTs. There is nothing to charge, nothing to plug in, and no software setup hurdle.Where the Nano S Plus and Nano X rely on a physical screen to verify transactions on-device, Tangem pushes that verification to your phone — a design some purists will dislike. But the durability story is unmatched here: IP69K waterproofing, shock resistance, a -25°C to 50°C operating range, and a rated lifespan of up to 25 years. Compared with the Nanos, which are small plastic devices that scratch easily (Ledger sells cases separately), Tangem’s cards feel closer to something you could genuinely carry in a wallet for decades.The tradeoff worth pausing on is key control. Tangem makes the seed phrase optional; by default, your backup is the second card. If that card is lost or destroyed alongside the first, recovery depends on choices you made at setup. Ledger’s mandatory 24-word recovery phrase is more familiar and portable across manufacturers. Buyers who want full manual key custody should think carefully here — but for everyone else, Tangem offers the lowest-friction entry into genuine cold storage we’ve seen in this comparison.
Pros:
- No batteries, cables, or setup — works via a simple NFC tap on your phone
- EAL6+ certified chip with no known remote hacks in 9+ years
- Waterproof (IP69K), shockproof build rated to last up to 25 years
- Second card included as an encrypted backup, with optional seed phrase
Cons:
- Requires an NFC-capable smartphone to function at all
- Optional seed phrase may unsettle users who want full manual key control
- No on-device screen for offline transaction verification
Best for: Buyers who want maximum simplicity, durability, and portability without managing cables, batteries, or a device screen
Not ideal for: Users without an NFC-capable phone, or those who insist on a mandatory, manually recorded seed phrase
Bottom line: The most frictionless and durable way to hold crypto keys offline — ideal if your phone has NFC and you’re comfortable with card-based backups.
“The most frictionless and durable way to hold crypto keys offline — ideal if your phone has NFC and you’re comfortable with card-based backups.”
Ledger Nano S Plus – Classic Crypto Hardware Wallet (Matte Black)
If Tangem reimagines the hardware wallet, the Ledger Nano S Plus refines the classic formula — and does it well enough to be our value pick. You get a 1.1-inch screen, physical buttons for on-device transaction verification, and support for 15,000+ coins and tokens managed through the single Ledger Live dashboard. Buying, selling, swapping, staking, and even hardware-backed passwordless 2FA for online accounts all live in one app.Compared with the Nano X, the differences are narrower than you might expect: the same certified Secure Element, the same coin coverage, the same software. What you give up is Bluetooth and iOS support — this model is USB-C wired only and works with desktop (Windows, macOS, Linux) and Android. For a desktop-first holder who occasionally signs transactions at a desk, that’s a trade worth making, since you’re not paying for wireless features you’d rarely use.Versus Tangem, the S Plus appeals to a different temperament. You must write down and safeguard a recovery phrase, and you must plug in a cable every time you transact — more friction, but more conventional control. The on-device screen also means you can verify recipient addresses without trusting your phone’s display. That makes this model better suited to security traditionalists, while Tangem suits minimalists.
Pros:
- Supports 15,000+ coins and tokens in a single dashboard
- CC EAL 6+ certified Secure Element keeps private keys offline
- All-in-one app for buying, selling, swapping, and staking
- Hardware-backed 2FA for securing online accounts
Cons:
- No Bluetooth — USB-C wired connection only
- Not compatible with iOS devices
- Android-only mobile support
Best for: Desktop-first buyers and Android users who want a proven screen-and-button wallet at the most sensible price point
Not ideal for: iPhone users and anyone who wants wireless, on-the-go transaction signing
Bottom line: The classic hardware wallet done right: full Ledger security and coin coverage for buyers who don’t need Bluetooth.
“The classic hardware wallet done right: full Ledger security and coin coverage for buyers who don’t need Bluetooth.”
Ledger Nano X Crypto Hardware Wallet with Bluetooth
The Ledger Nano X exists for one reason the other two picks can’t fully serve: true wireless mobility across every major platform. Bluetooth connectivity means iPhone users — locked out of the Nano S Plus entirely and unable to use Tangem without NFC — finally get a first-class hardware wallet experience. Add desktop and Android support, plus USB and NFC as fallback connection methods, and this is the most flexible device in the lineup by a clear margin.Functionally, it mirrors the Nano S Plus: the same 15,000+ asset support, the same Ledger Live dashboard for buying, swapping, and staking, the same certified Secure Element. The choice between the two Ledgers is therefore purely about how you connect, not how secure you are. If you ever expect to sign transactions away from your desk — at a coffee shop, while traveling, on an iPhone — the X justifies its premium. If you’re a desk-bound desktop user, the S Plus is the smarter buy and the X’s advantages go unused.Against Tangem, the X is bigger and needs charging, but it offers an on-device screen for verifying transactions without trusting your phone, plus a standard recovery phrase workflow. Our one practical gripe: the plastic body scratches easily and Ledger sells protective cases separately — an odd corner to cut on a device meant to be carried. It’s also incompatible with Chromebooks, which rules it out for anyone living in that ecosystem.
Pros:
- Bluetooth connectivity for genuinely wireless mobile use
- Full iOS, Android, and desktop compatibility
- Supports 15,000+ coins and tokens via the Ledger Live app
- Multiple connection options: Bluetooth, USB, and NFC
Cons:
- Not compatible with Chromebooks
- Scratches easily without a protective case (sold separately)
- Larger and requires charging, unlike Tangem’s battery-free cards
Best for: iPhone owners and mobile-first users who want to buy, swap, and stake crypto on the go with Bluetooth convenience
Not ideal for: Chromebook users and desk-only holders who would be better served by the cheaper Nano S Plus
Bottom line: The pick for iPhone users and mobile-first holders — same Ledger security as the S Plus, plus the wireless freedom it lacks.
“The pick for iPhone users and mobile-first holders — same Ledger security as the S Plus, plus the wireless freedom it lacks.”
As an Amazon Associate we earn from qualifying purchases.
Before You Start
Check the tamper-evident packaging when the device arrives. Genuine devices use sealed boxes or holographic seals; if the seal is broken or looks re-glued, photograph it and contact the manufacturer before proceeding. Set aside uninterrupted time — the recovery phrase step should not be done in a public place, on camera, or around people who can see your screen. Clear your desk, close other applications, and have a private space ready. If you plan to store meaningful value on this wallet, order a metal backup plate (e.g., Cryptosteel, Billfodl) in advance; paper backups fail to fire and water.
Step-by-Step Instructions
Step 1: Inspect the device and verify authenticity
Unbox the hardware wallet and physically inspect it. Confirm the box seal was intact, no recovery phrase card is included in the packaging, and the device shows no signs of prior setup. Then go to the manufacturer’s official website and follow their authenticity verification instructions — for Ledger, this happens automatically in Ledger Live during setup; for Trezor, the device’s hologram and firmware check in Trezor Suite serve this purpose.
Tip: If anything about the packaging seems off — a resealed box, a phrase already printed anywhere, an included ‘helpful’ instruction card telling you to use a specific website — stop. Contact the manufacturer’s support with photos.
Check: The device passes the manufacturer’s authenticity check in the next step, and no pre-set PIN or phrase exists on it.
Step 2: Install the official companion software
Download the companion app only from the manufacturer’s official website — type the URL manually rather than clicking search-engine ads, which frequently point to fake lookalike sites. Install Ledger Live for Ledger devices, Trezor Suite for Trezor, or the BitBoxApp for BitBox. Launch the app and let it update to the latest version before connecting the device.
Tip: Search engine ads for wallet software are a major phishing vector. Bookmark the official site after verifying the URL character by character.
Check: The app opens, reports it is up to date, and shows a ‘connect device’ or ‘get started’ prompt.
Step 3: Connect the device and install firmware
Plug the hardware wallet into your computer using the supplied cable. The companion app will detect the device and prompt you to install or verify the firmware. Approve the installation and confirm on the device itself by pressing its buttons when prompted. The device will restart during this process.
Tip: Never disconnect the device mid-firmware-installation. If the app says firmware is already genuine and up to date, that is normal for newer devices shipped with installed firmware.
Check: The companion app shows the device as connected with genuine, up-to-date firmware, and the device screen displays its main menu.
Step 4: Create a new wallet and write down the recovery phrase
Choose ‘Create a new wallet’ (not ‘restore’) in the app or on the device. The device will generate a 12- or 24-word recovery phrase and display it on its own screen, a few words at a time. Write each word in exact order onto the supplied recovery sheet using pen. Advance through all words, then confirm you have written them down. Most devices then quiz you by asking you to re-enter selected words to prove the backup is correct.
Tip: Write the words only on paper or metal — never type them into your computer, phone, email, cloud notes, or a photo. Anyone who sees these words can steal all funds on the wallet, forever.
Check: The device accepts your word-entry quiz without errors and proceeds to PIN setup, confirming the backup matches.
Step 5: Set a strong PIN
Choose a PIN of 6-8 digits (the maximum the device allows) and enter it on the device when prompted. Enter it a second time to confirm. This PIN unlocks the device each time you connect it; incorrect attempts eventually wipe the device, which is safe as long as your recovery phrase is intact.
Tip: Do not use repeating digits, birth years, or patterns. The PIN protects the device if it is stolen — your recovery phrase remains the ultimate backup.
Check: The device accepts the PIN confirmation and returns to its main menu; the companion app shows the wallet as initialized with a zero balance.
Step 6: Verify the recovery phrase backup works
Before funding the wallet, prove your backup is usable. Use the device’s built-in recovery check function (Ledger: Settings > Security > Verify recovery phrase; Trezor: Device > Check recovery seed). The device will ask you to re-enter words from your sheet. Complete the check and confirm it passes.
Tip: This optional-looking step is not optional. A typo in word 17 that surfaces a year from now, after the device fails, is unrecoverable. Two minutes now prevents a total loss later.
Check: The device reports the recovery phrase check as valid.
Step 7: Install the app for your coin and find your receive address
In the companion app, install the currency app for the coin you plan to hold (e.g., Bitcoin or Ethereum). Then open the account section, click ‘Receive’, and the app will generate a receive address. Before using it, verify the address on the hardware wallet’s own screen — the app will prompt you to confirm. Check that the address shown on the device exactly matches the one in the app.
Tip: Always verify receive addresses on the device screen. Malware on your computer can swap clipboard addresses; the device screen cannot be tampered with remotely.
Check: The address on the device screen matches the app character for character, and you copy it only after this check.
Step 8: Send a small test transaction
From your exchange or existing wallet, send a small amount — roughly $10-20 worth — to the verified receive address. Wait for the transaction to confirm on the blockchain (usually 10-60 minutes depending on the coin and network congestion). Confirm the balance appears in your companion app.
Tip: Never move your full holdings on the first transfer. Test with a small amount, then send the remainder once the balance shows correctly.
Check: The companion app shows the test amount credited to your wallet address.
Step 9: Send a test amount back out
To prove you can spend from the wallet, send a small amount back to your exchange or another address you control. In the companion app, create the transaction, and confirm every detail on the hardware wallet screen — address, amount, and fee — before pressing the physical buttons to sign it. Verify the funds arrive at the destination.
Tip: Make it a habit to read the full address and amount on the device screen before signing. This is the moment the hardware wallet protects you from a compromised computer.
Check: The transaction signs on the device, broadcasts successfully, and arrives at the destination address.
Step 10: Store the recovery phrase and secure the device
Store your written recovery phrase in a location that is safe from fire, water, and theft — a home safe, a bank safe deposit box, or ideally stamped into a metal plate kept somewhere private. Never store it as a photo, digital note, or email. Store the hardware wallet itself separately from the phrase, in a dry place. Consider adding a passphrase (25th word) for large amounts once you are comfortable with the basics.
Tip: Do not store the phrase and the device in the same bag or location. One stolen alone is harmless; both together are a total loss.
Check: The phrase is physically secured in at least one protected location, and you know exactly where it is.
Common Mistakes to Avoid
- Buying from a reseller or marketplace seller and receiving a tampered device with a pre-filled recovery phrase — Buy only from the manufacturer’s official website. If a device arrives with any recovery phrase already present, do not use it.
- Typing the recovery phrase into a computer, phone, or website ‘to back it up digitally’ — The phrase exists only on the device screen and your paper or metal backup. No legitimate service will ever ask you to enter it, and no digital copy is safe.
- Skipping the recovery phrase verification quiz and the test transaction, then funding the wallet heavily — Always complete the device’s recovery check and both a small incoming and outgoing test transaction before moving significant value.
- Falling for a fake companion app via a search-engine advertisement — Type the manufacturer’s URL directly, verify it character by character, and bookmark it for all future downloads and updates.
Troubleshooting
Problem: The companion app does not detect the connected device
Solution: Try a different USB port (preferably directly on the computer, not a hub), a different cable, and restart both the app and the device. On Windows, a driver prompt may appear — allow it. If using a phone, confirm you have the correct USB-C or Lightning adapter and that the app has permission to access USB devices.
Problem: Firmware installation fails or the device appears stuck
Solution: Leave the device plugged in and do not unplug it during an update. If it truly fails, the device enters a recovery mode that the companion app will detect on the next connection attempt — follow the app’s prompt to retry the installation. Contact manufacturer support before attempting anything drastic.
Problem: The recovery check reports an invalid phrase
Solution: Re-read the words directly from the device’s ‘show recovery phrase’ function (if available) and compare against your sheet word by word. A single wrong or misordered word causes failure. If the sheet is wrong, you must reset the device and set it up again with a fresh wallet before it holds funds.
Problem: The test transaction does not appear after a long wait
Solution: Look up the transaction hash or your receive address on a public block explorer for that coin. If the explorer shows the transaction as unconfirmed, it is a network fee/congestion issue and will settle. If the explorer shows no transaction at all, the send never left the exchange — check the exchange’s withdrawal history.
What Success Looks Like
Your setup is complete when all of the following are true: the device passes authenticity and firmware checks in the official companion app; you have written your recovery phrase on paper or metal and the device’s own verification confirms it is correct; a PIN is set; a small incoming transaction appears as a balance in your app; a small outgoing transaction signed on the device and arrived at its destination; and the recovery phrase is physically secured away from the device. At this point the wallet is safe to receive larger amounts.
Next Steps
After verifying everything works, transfer your main holdings in a second, larger transaction and confirm the balance. Set a recurring calendar reminder to check your backup twice a year — confirm the sheet is legible and still where you expect. Consider adding a passphrase (‘hidden wallet’) for significant value once you understand the tradeoff: a passphrase adds security but is itself a secret that must be remembered or stored securely, and forgetting it means permanent loss. For very large holdings, a second hardware wallet from a different manufacturer holding the same recovery phrase provides redundancy against a single device failing or a firmware bug. Finally, learn your device’s recovery procedure: practice restoring the wallet from your phrase on the device (this wipes it first) once you are confident, so you know exactly what to do if the device is ever lost or damaged.
Frequently Asked Questions
What happens if I lose the hardware wallet itself?
Nothing is lost as long as you have your recovery phrase. Buy a new device (any compatible model from the same ecosystem), choose ‘restore wallet’, enter your recovery phrase, and all your funds reappear. The device is just a key holder; the phrase is the wallet.
Can someone steal my crypto if they have the device but not the phrase?
They would still need your PIN, and after several wrong attempts the device wipes itself. Your funds remain safe because you can restore from your recovery phrase onto a new device at any time.
Do I need to keep the hardware wallet plugged in to receive crypto?
No. Crypto sent to your addresses is recorded on the blockchain and accumulates regardless of whether the device is connected. You only need the device plugged in to view accounts in some apps (unless you use a watch-only view) and to sign outgoing transactions.
Can I use one hardware wallet for multiple cryptocurrencies?
Yes. Most devices support hundreds of coins. You install the relevant app or enable the coin in the companion software, and each coin gets its own accounts under the same recovery phrase.
Should I take a photo of my recovery phrase as an extra backup?
No. Photos sync to clouds, get indexed by gallery apps, and can be extracted by malware. Use paper stored securely, or better, a metal plate for durability. If you want a second backup, write a second paper copy and store it in a separate secure location.
Fall Picks
fall essentials
As an affiliate, we earn on qualifying purchases.